3D Scanning Cars With Photogrammetry
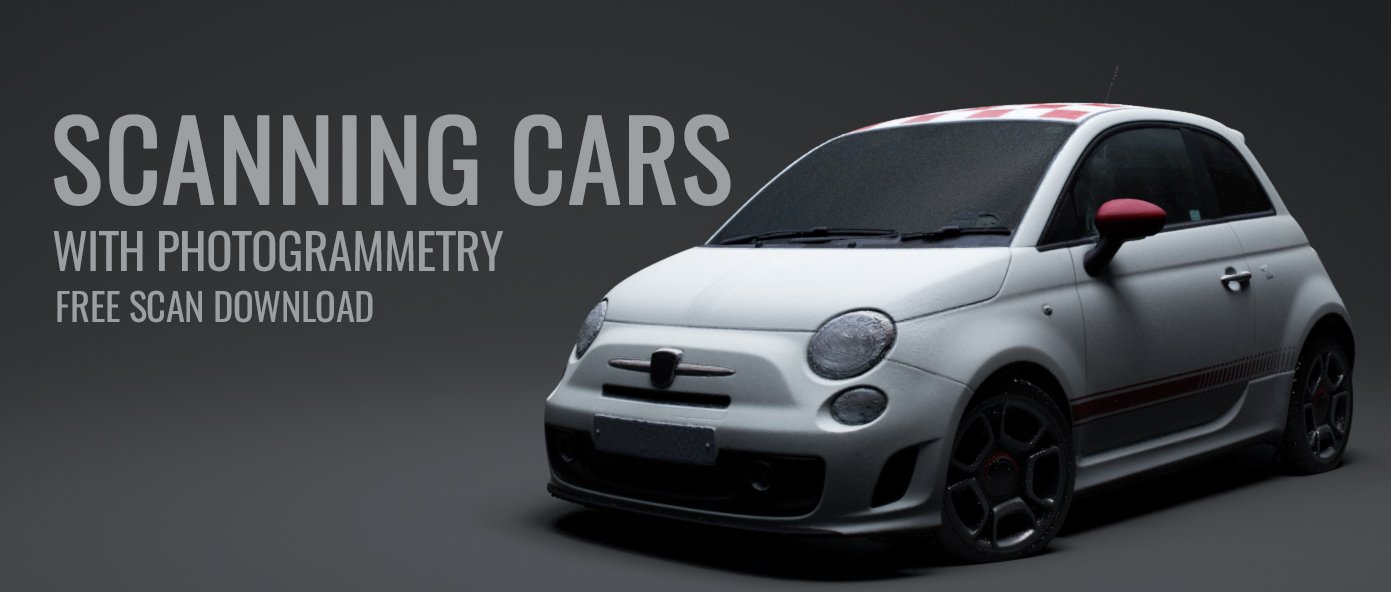
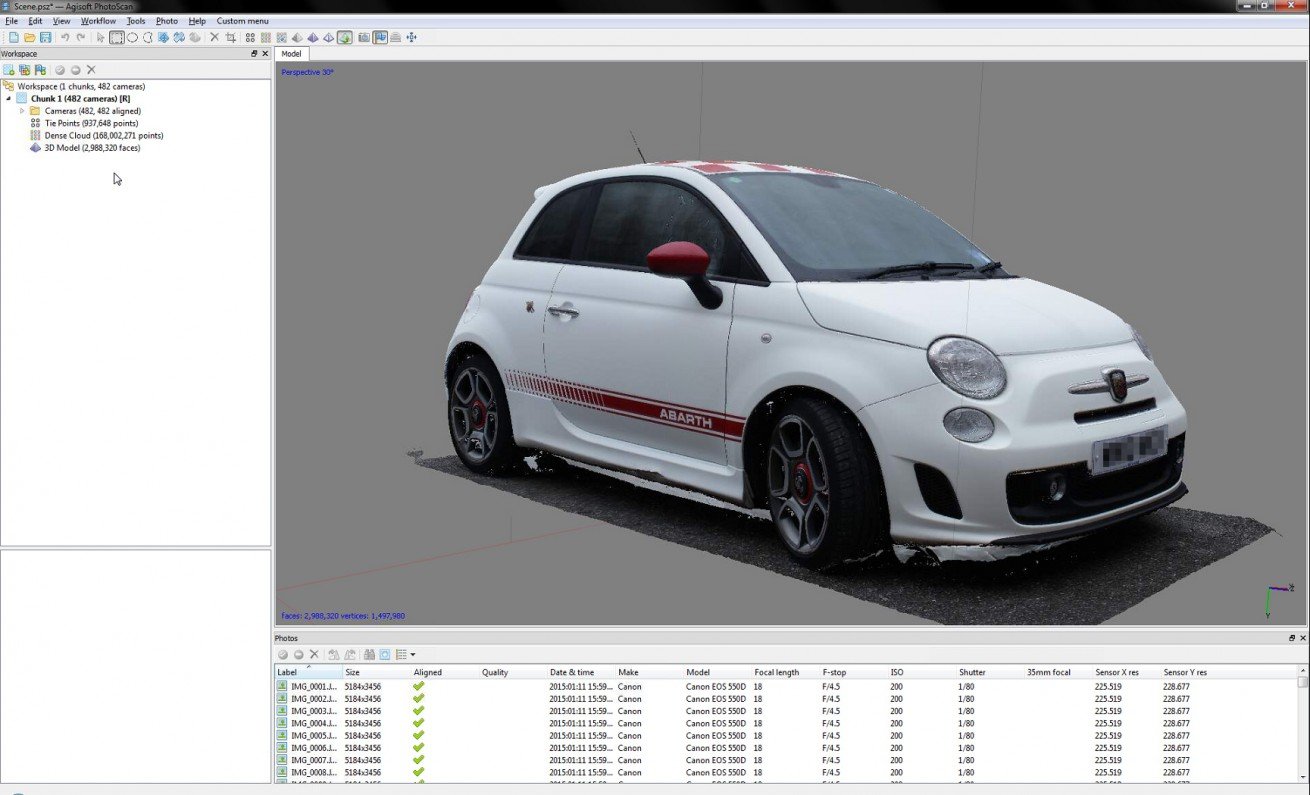
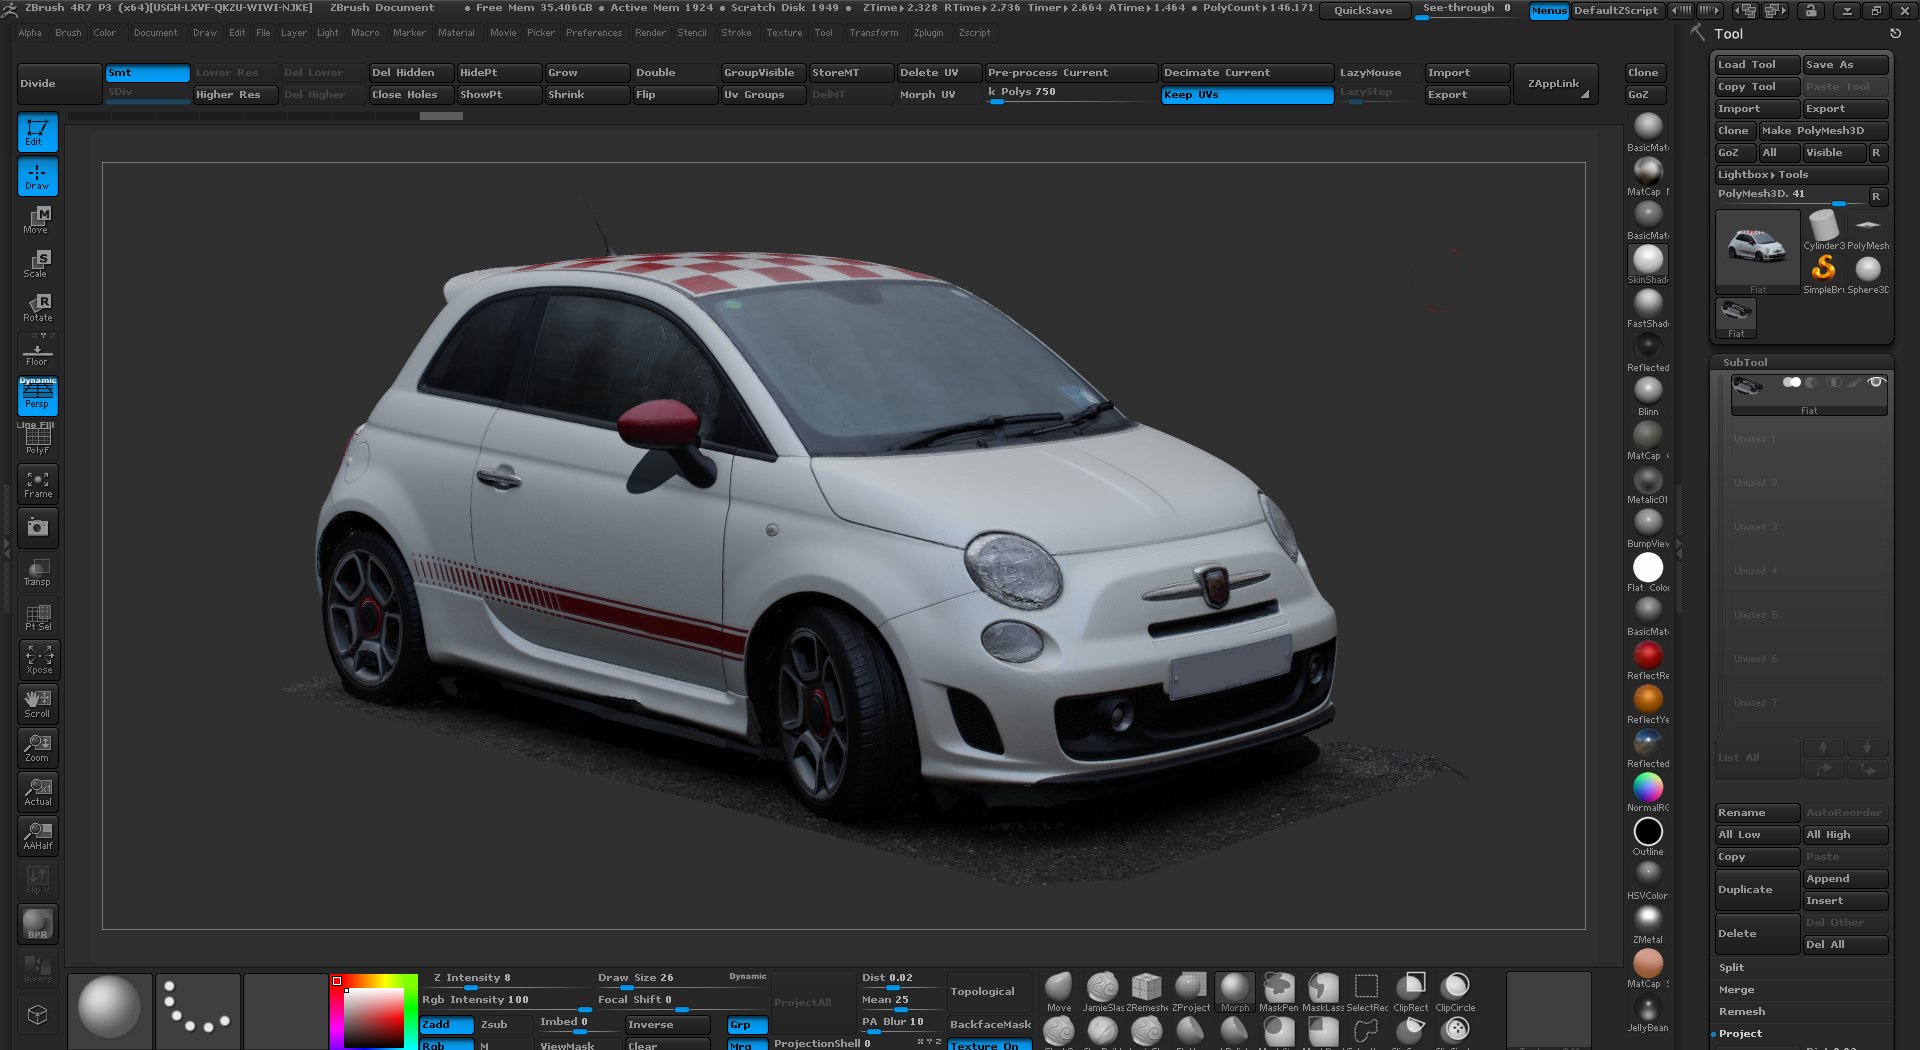
The example we're giving away on this page was actually our very first attempt at scanning a car around 2 years ago. We purposefully chose the hardest one we could i,e pure white with decals and coloured surfaces. The aim was to get close to laser scanner quality without destroying the car or without spraying the entire thing with expensive and hard to remove matting powder as used in our scanning reflective objects tutorial.
Since this test our techniques have improved considerably and the were now able to scan with around 3 times to resolution of the free example. which we would now consider crude compared to what we have in store for the tutorial.
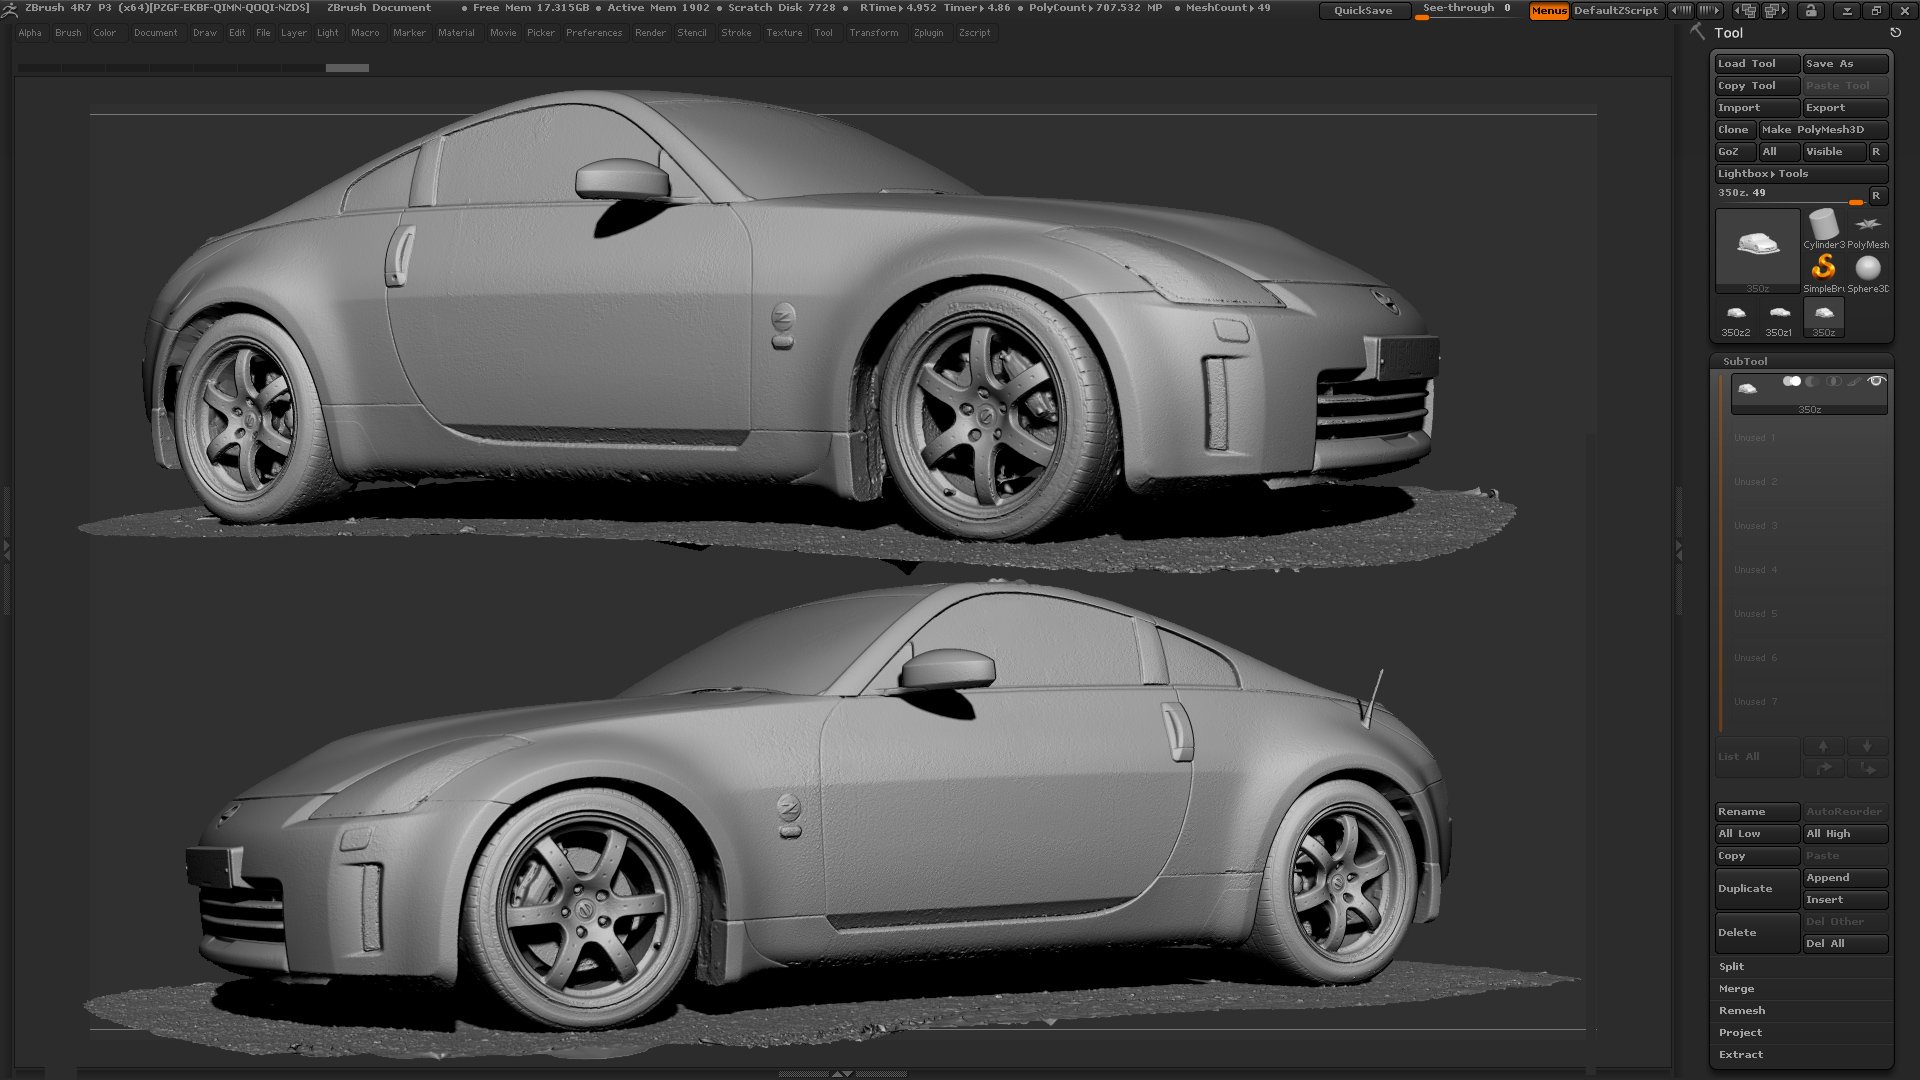
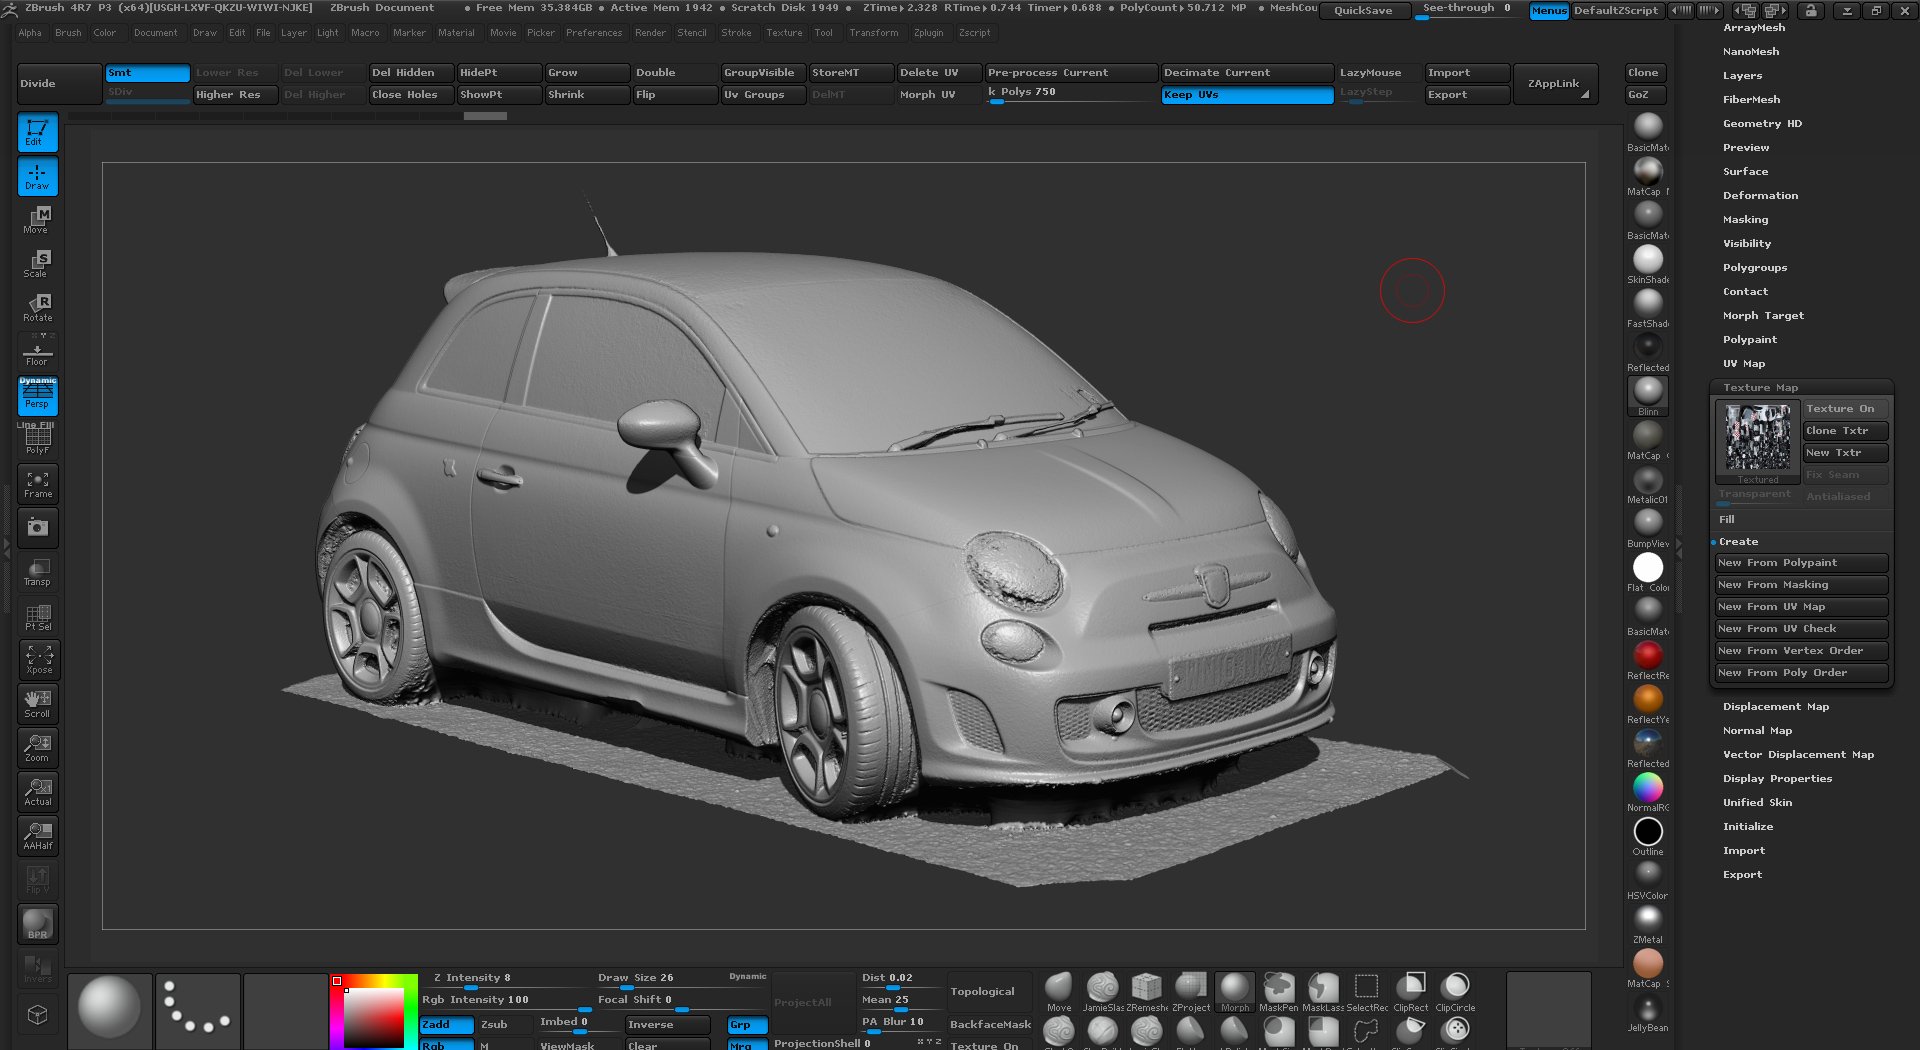
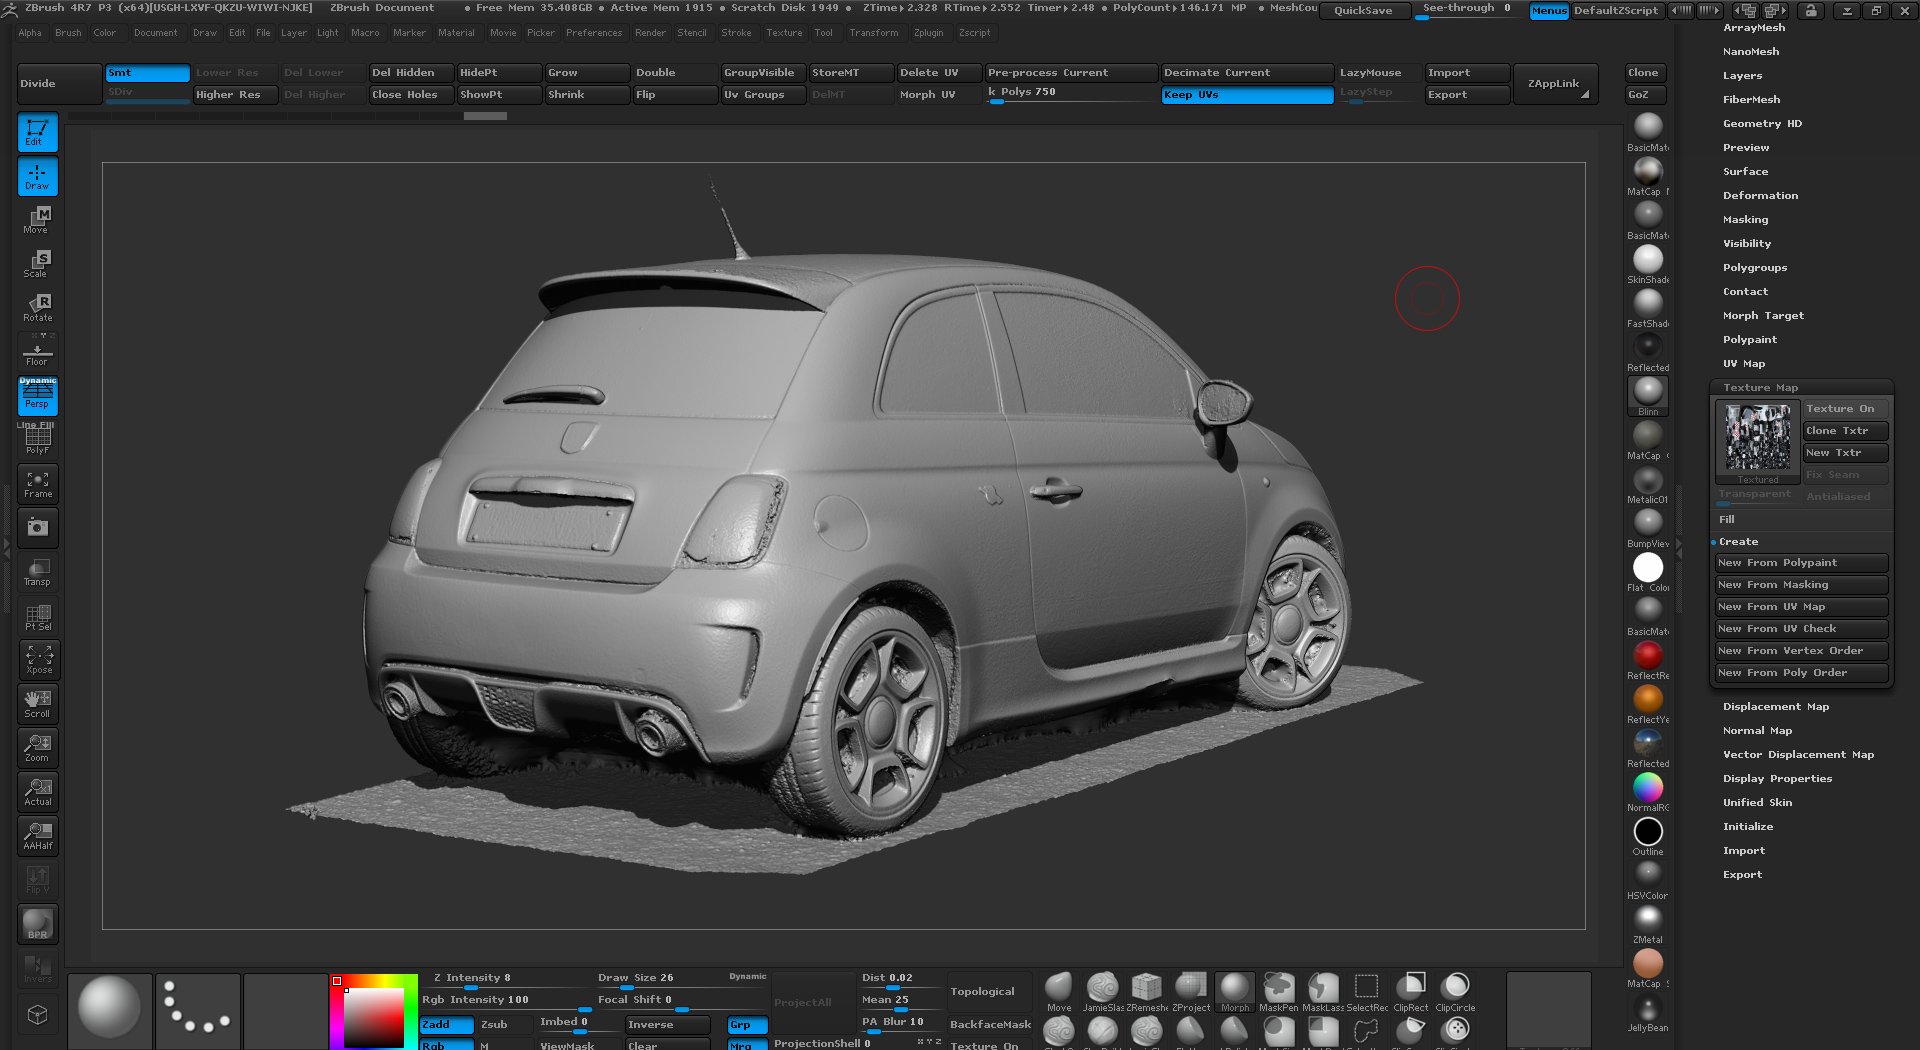
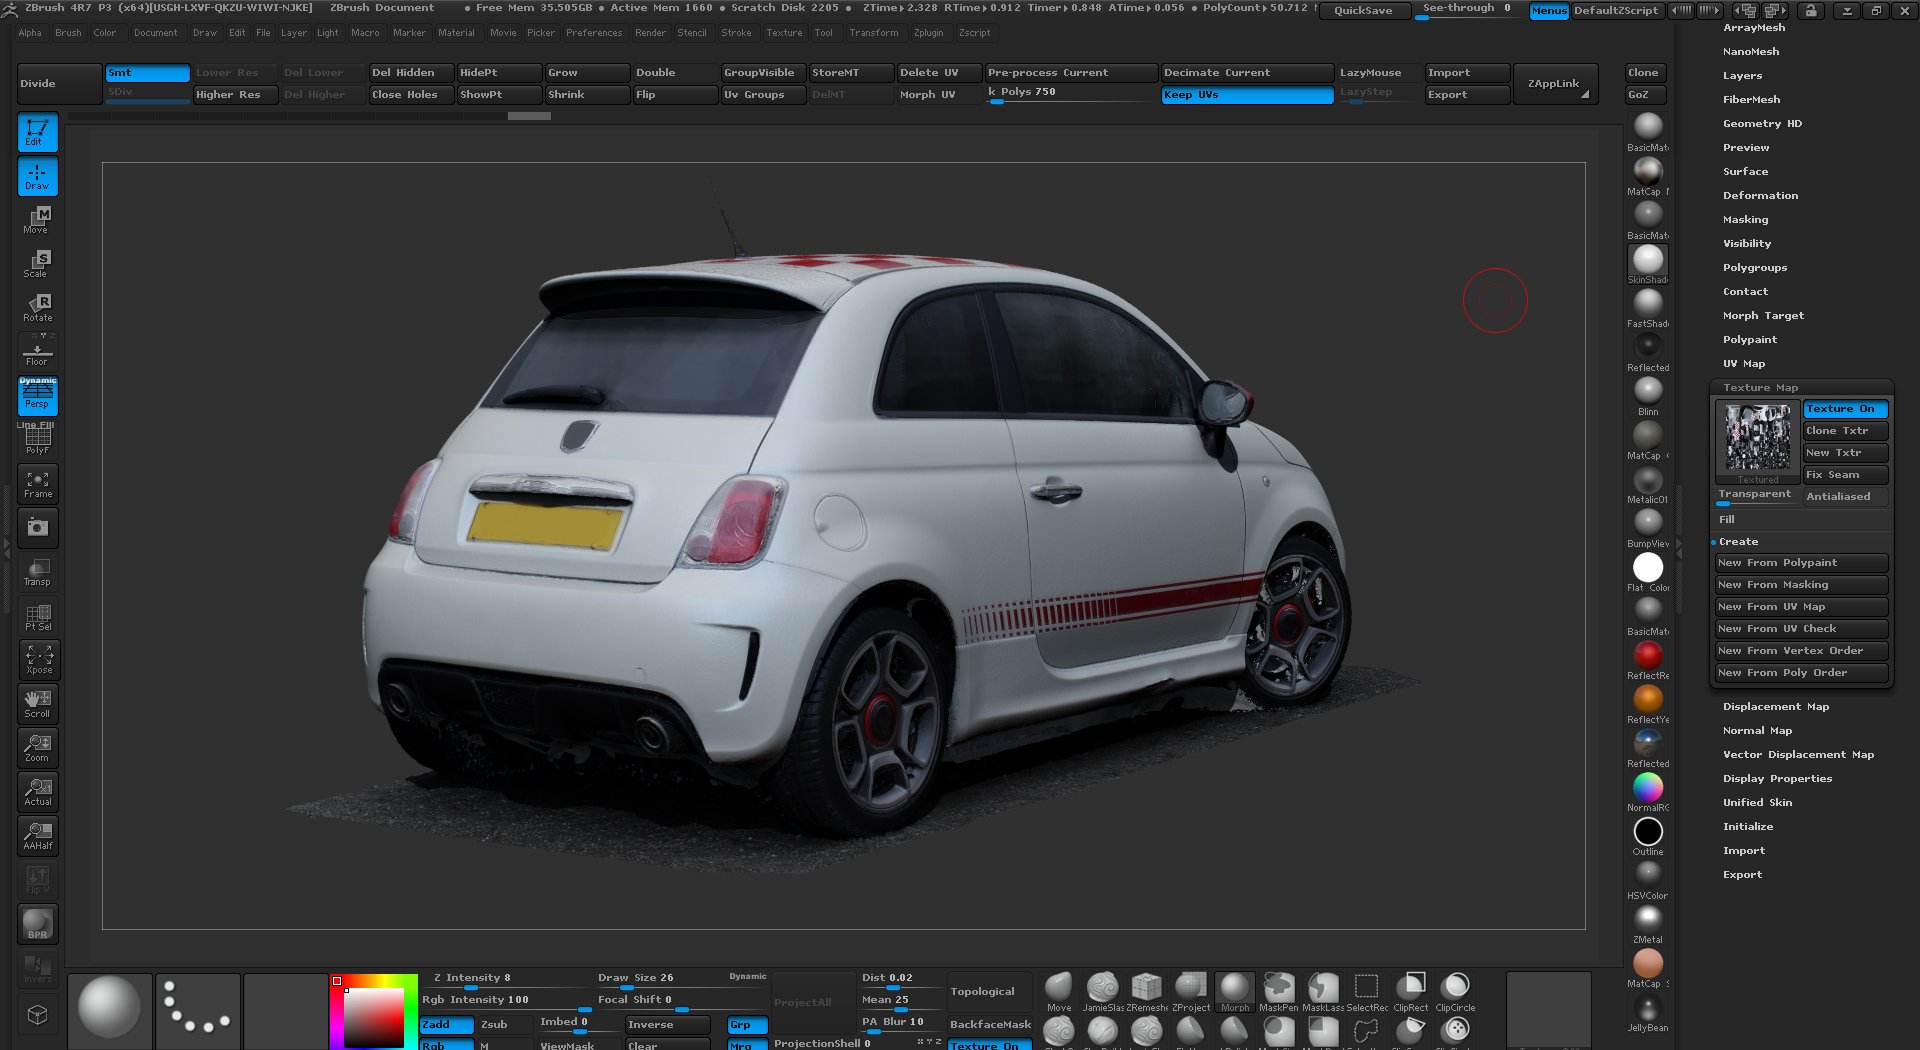
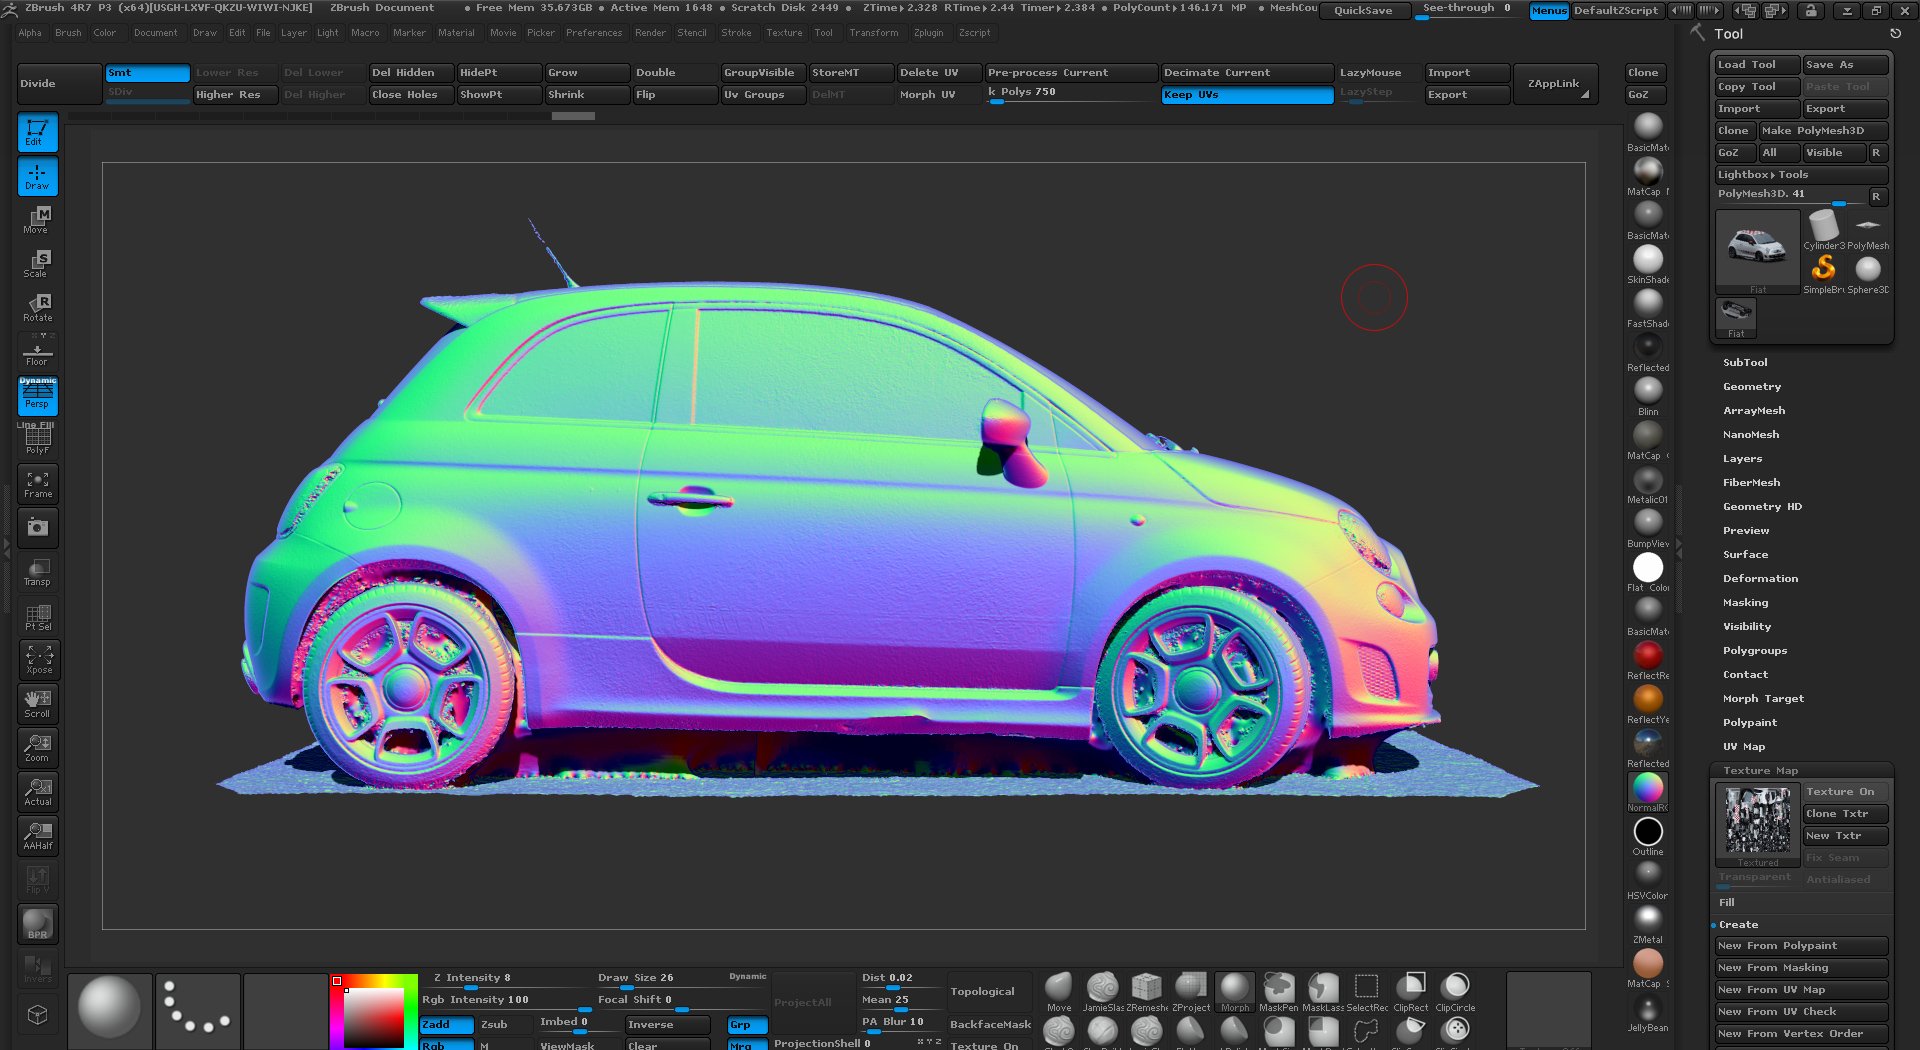
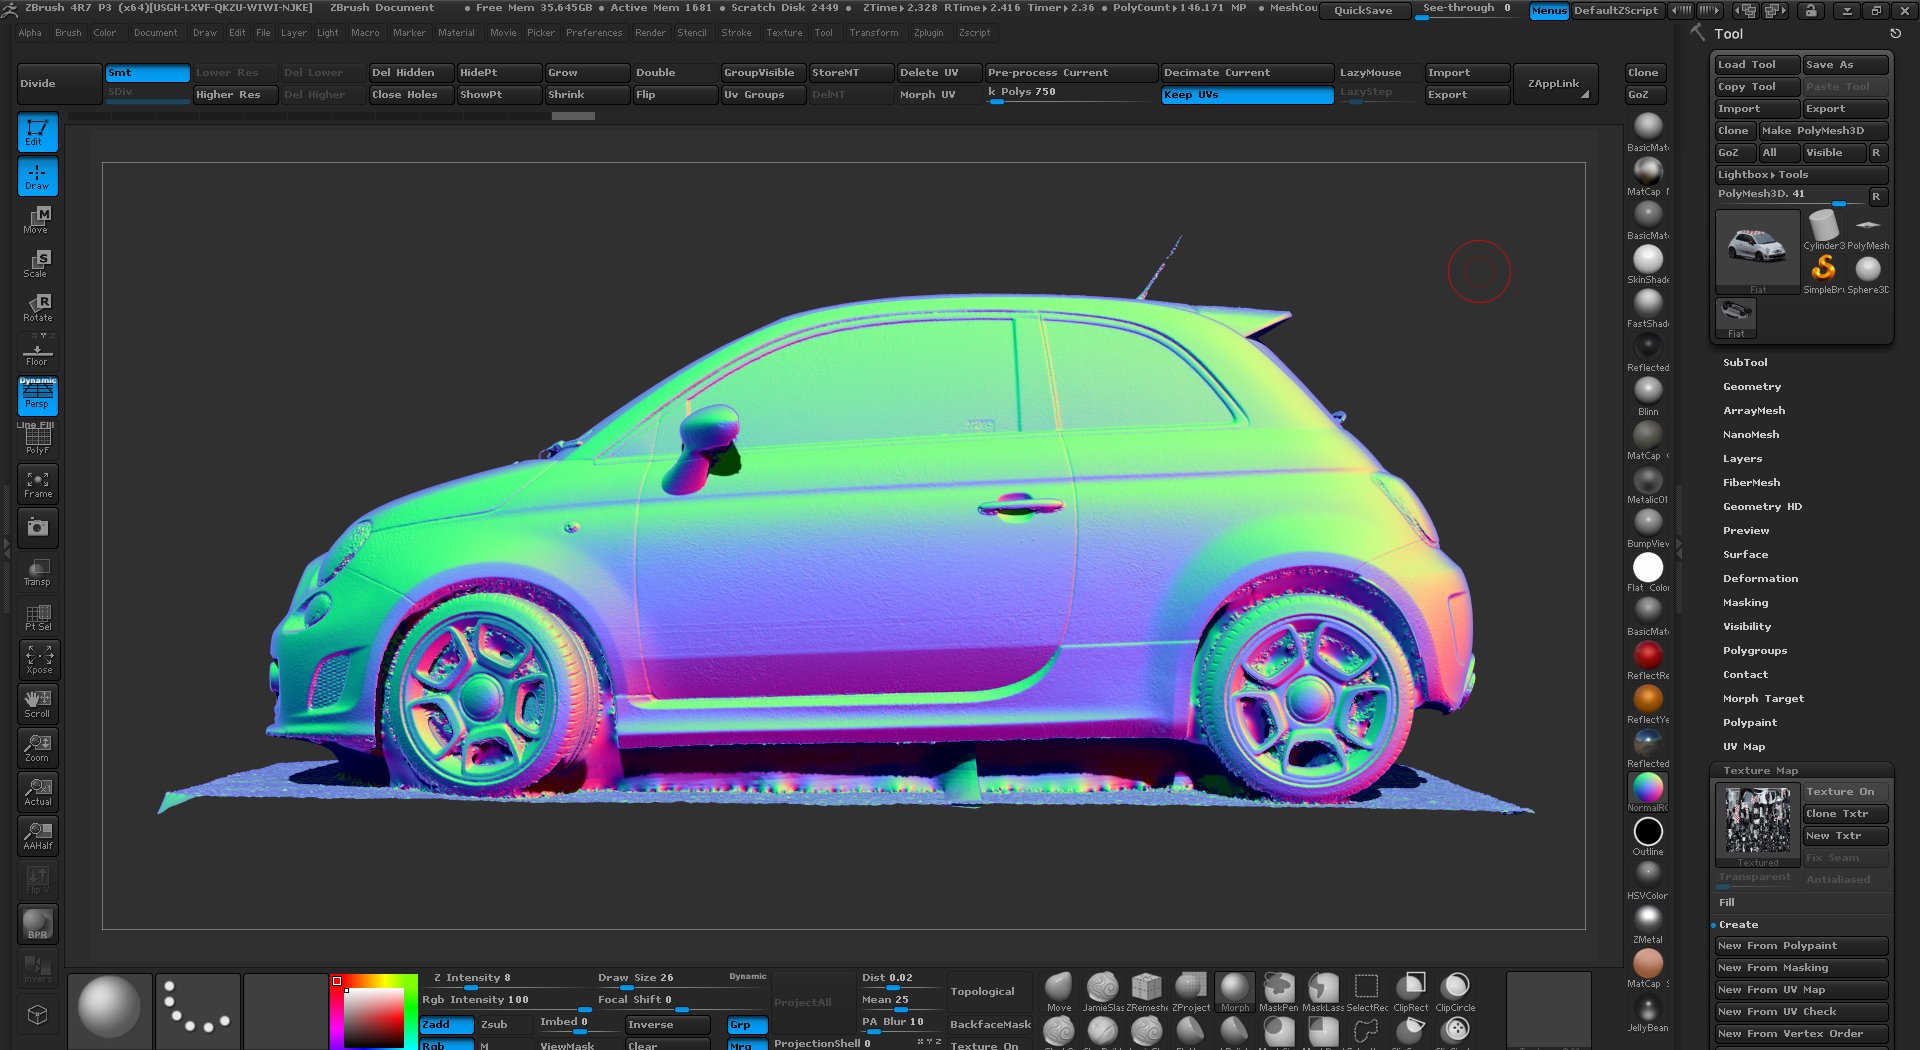
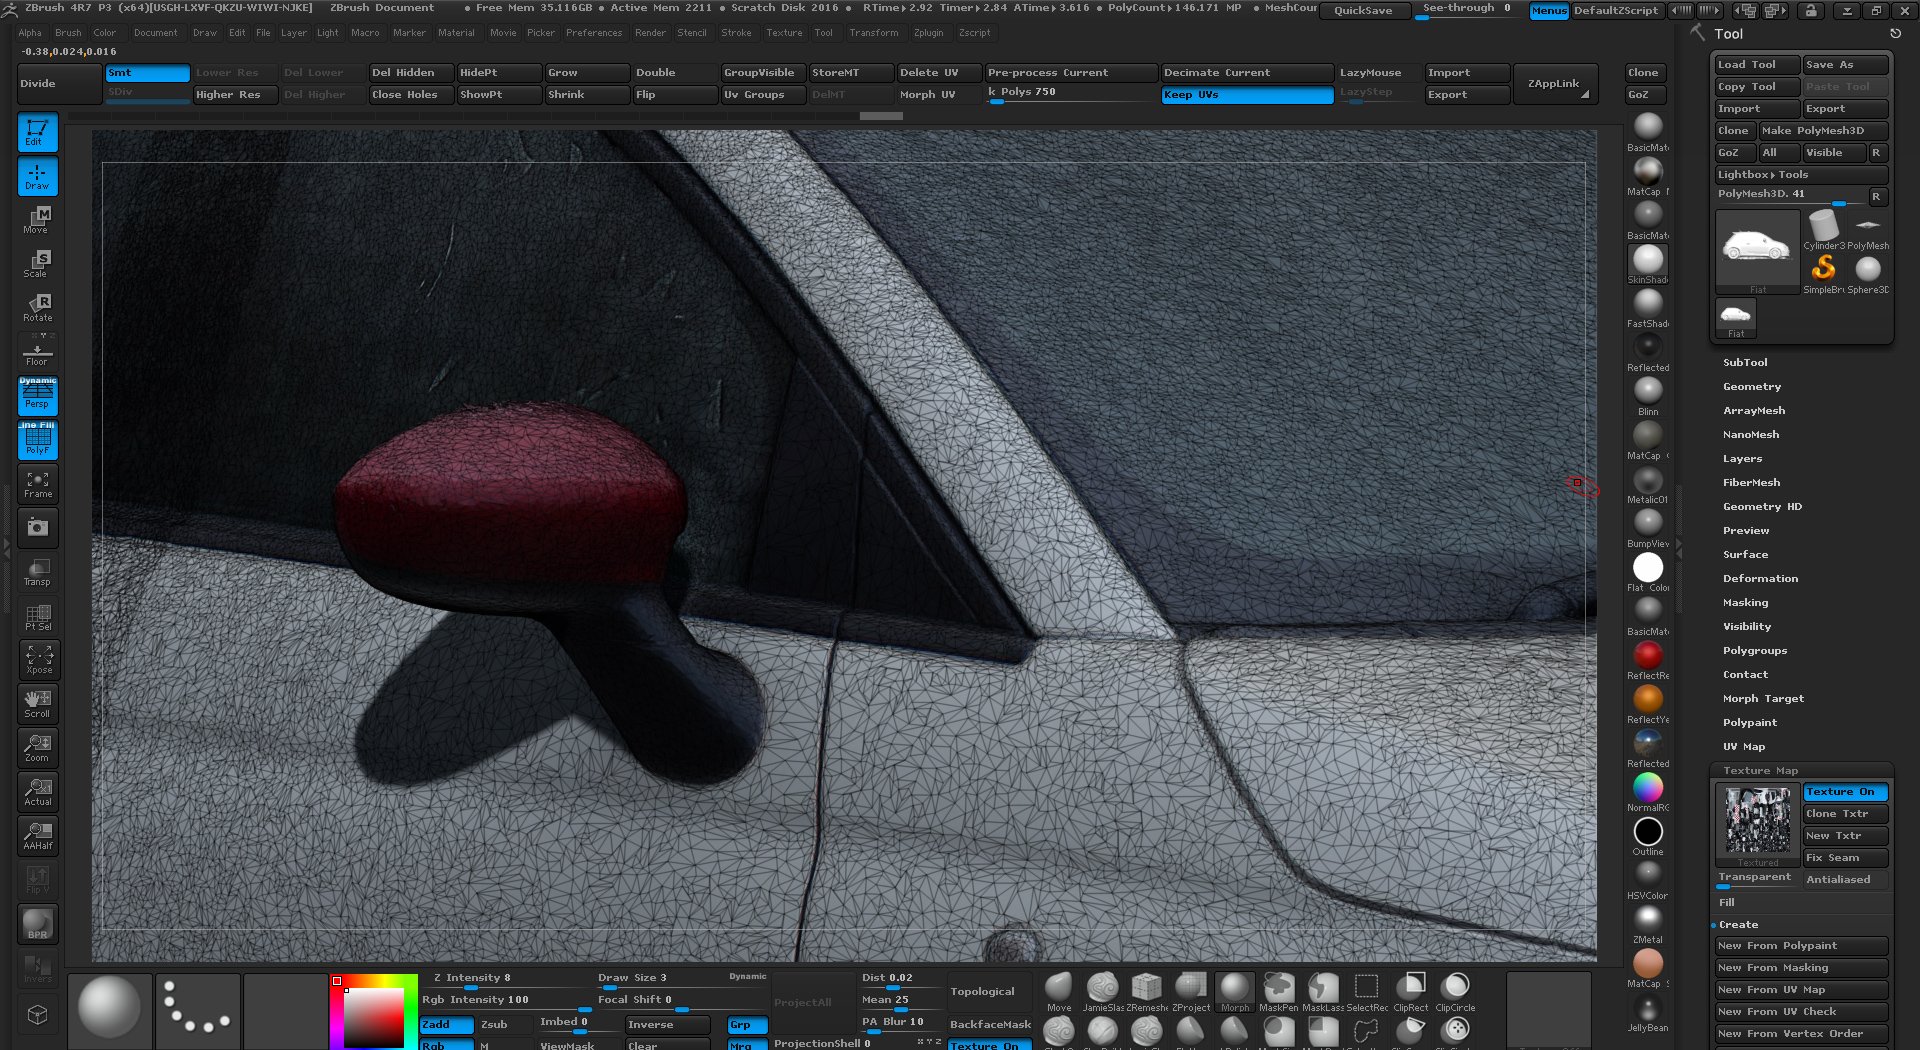
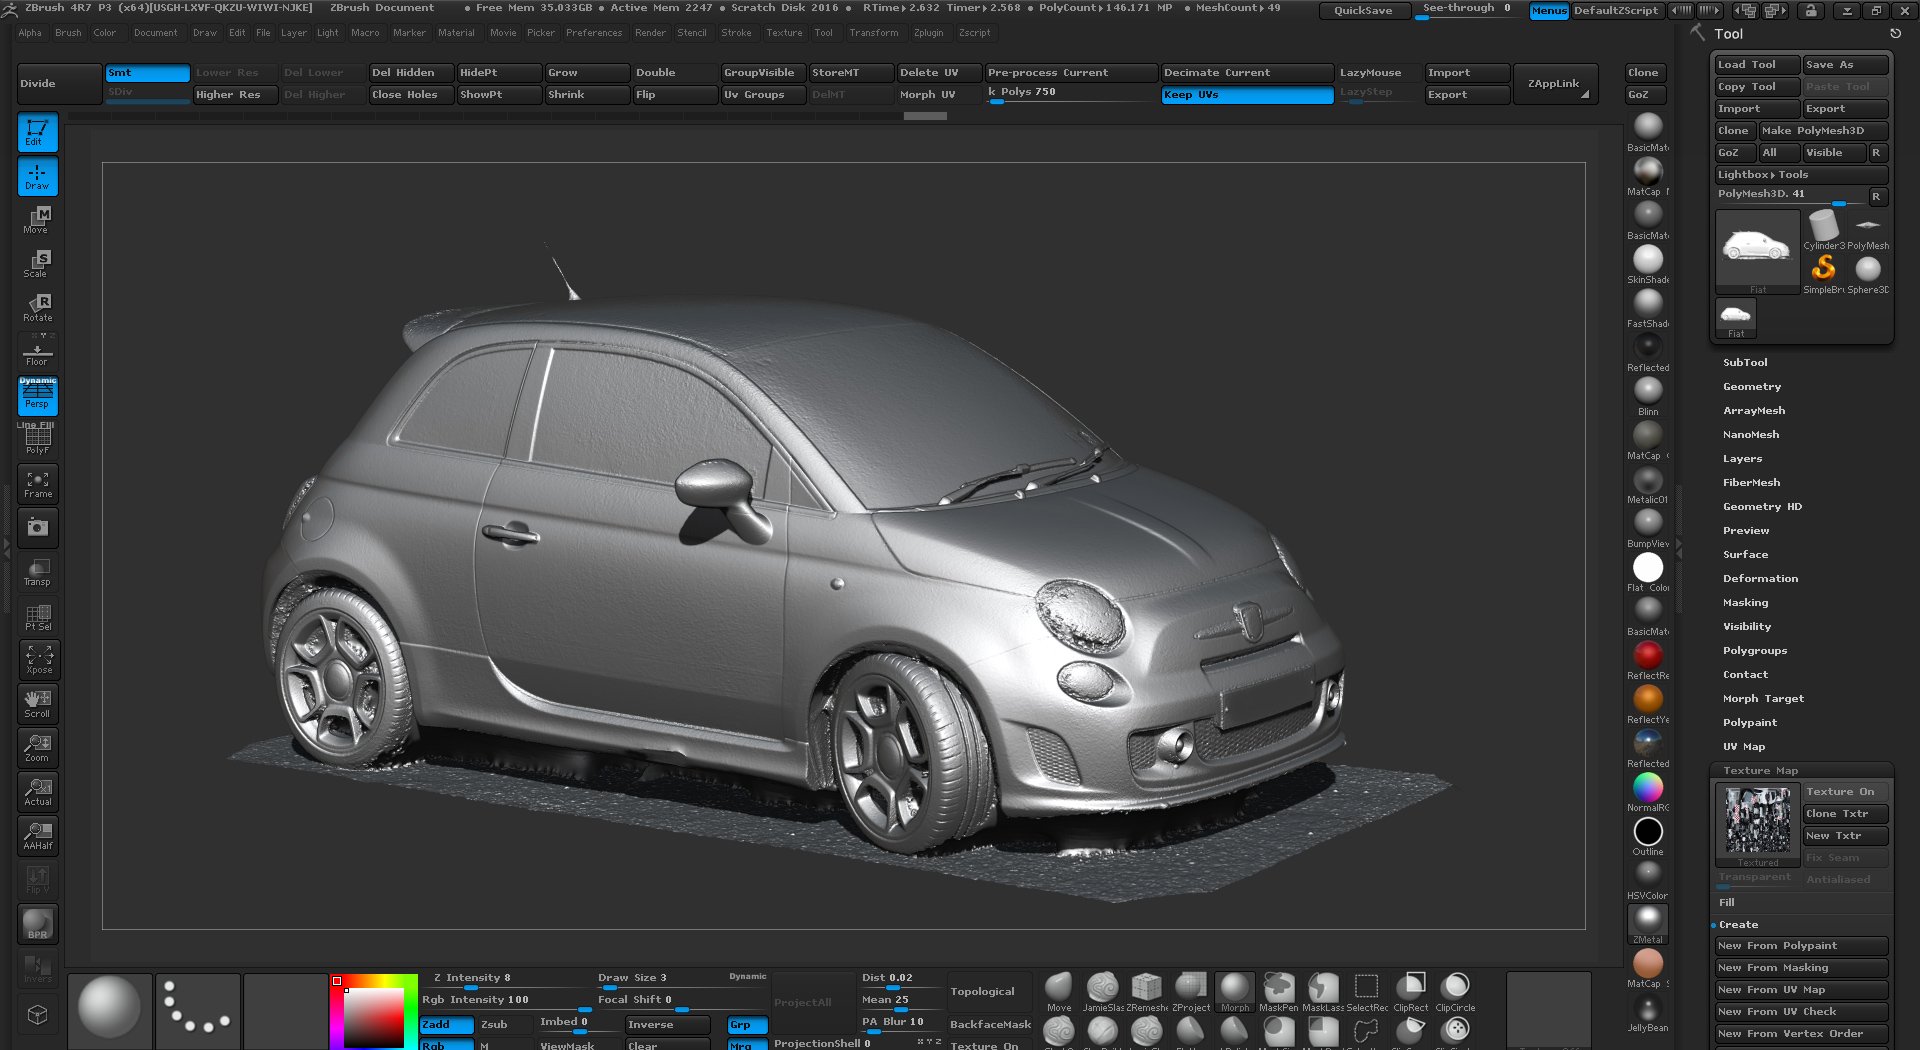
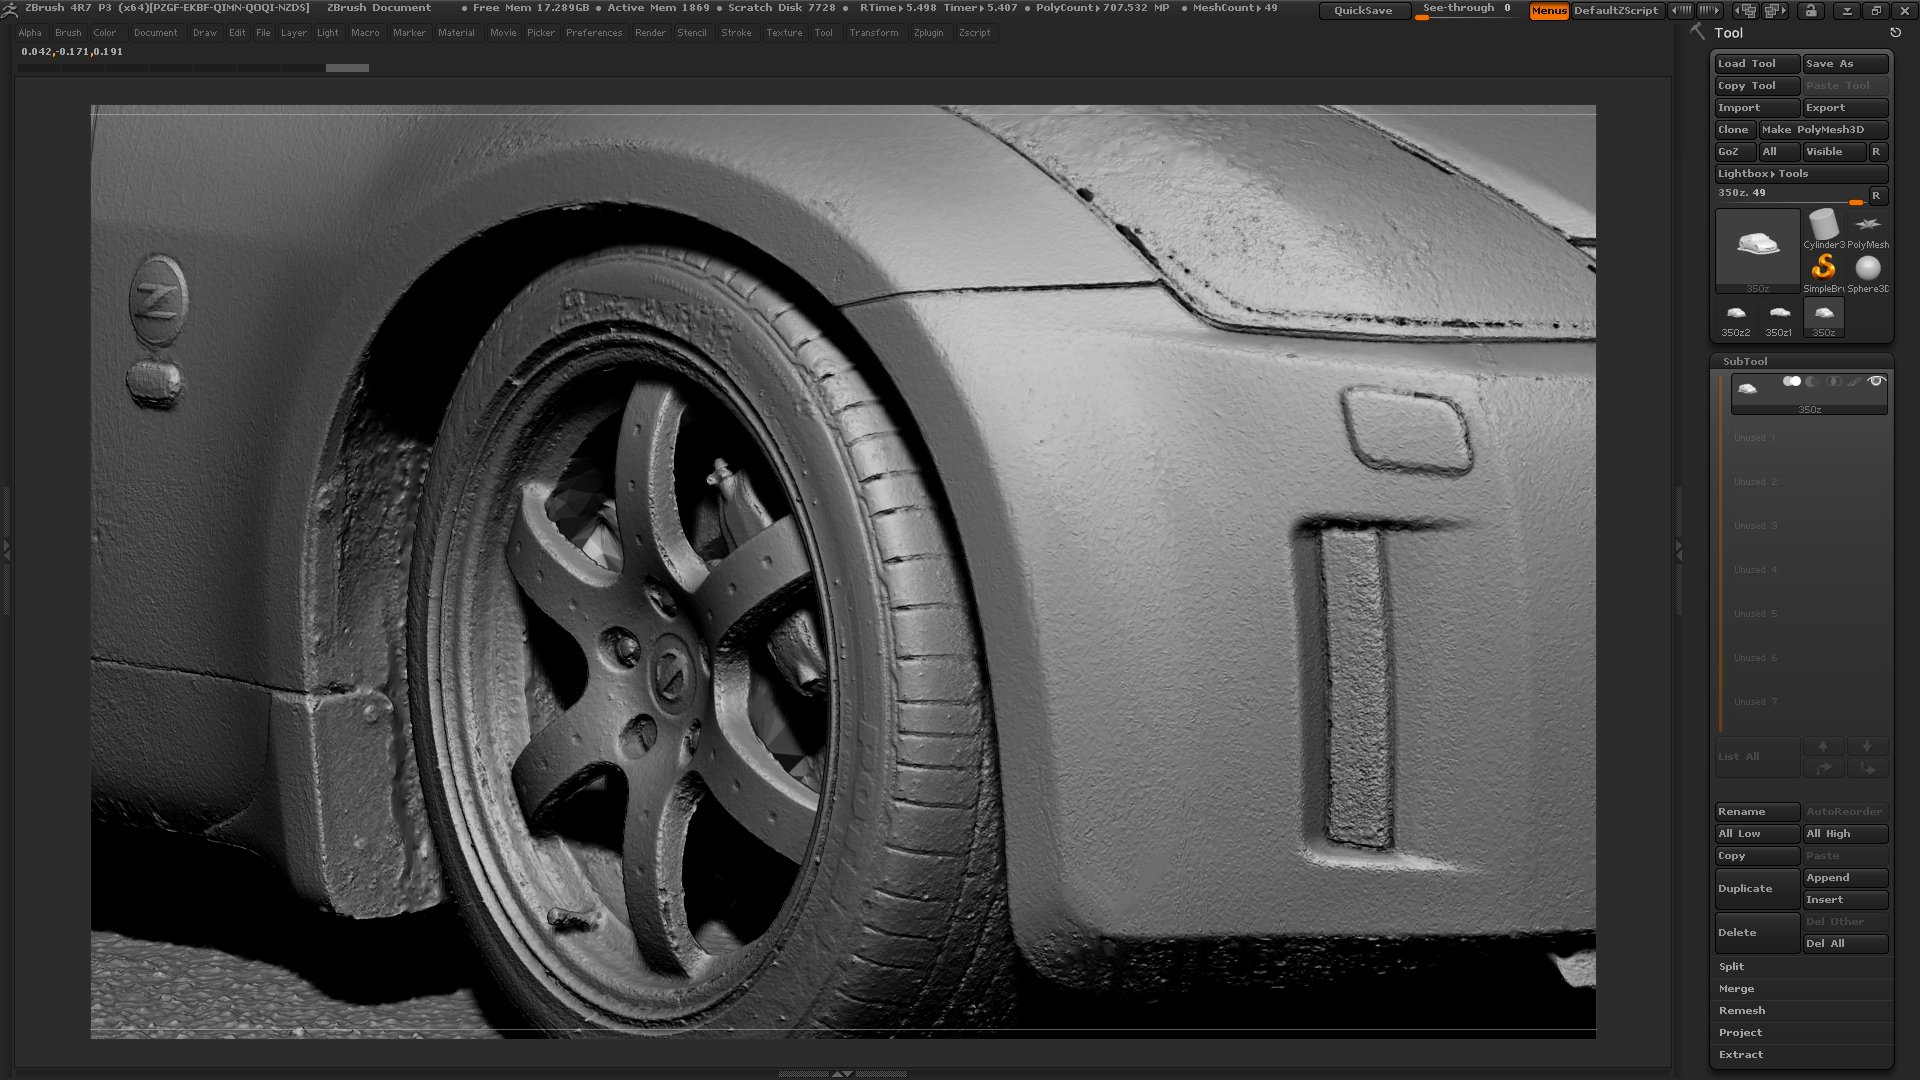
Here are some more images of the scan loaded into Zbrush, As you can see from the renders below at the time there were some issues with scanning the highly reflective / refractive areas such as the headlights. Also, highly occluded areas under the wheels and around the exhaust suffered due to a number of factors including lack of image coverage and poor lighting on the day of the shoot. We now have full proof low-cost techniques to tackle these issues that will be explained in the tutorial. The textures on this model are also fairly low quality due again to the lack of proper coverage and changing lighting conditions. Due to the high reflectivity of the windscreen glass, the resulting glancing angle reflections have combined during processing to make for a pretty nasty white sheen. This effect may, unfortunately, be totally unavoidable however glass is transparent and as such has no colour so we see very little point in actually trying to solve this problem. Typically a model like this would be remodelled from scratch with shaders providing the glass surface rather than a captured texture.
Technical Details
- Photographs used :: 482
- Processing Software :: AGI Photoscan
- Point Cloud :: 168,000,000 points
- Capture Time :: 40 minutes
- Processing time :: 9 hours in AGI
- Camera :: Canon 100D
We hope you can find some use for the scan, it's a perfect starting point for creating a 100% accurate model using just about the best reference you can possibly have. please be sure to read the legal information on the next page before downloading.
More images
AGI Photoscan scene
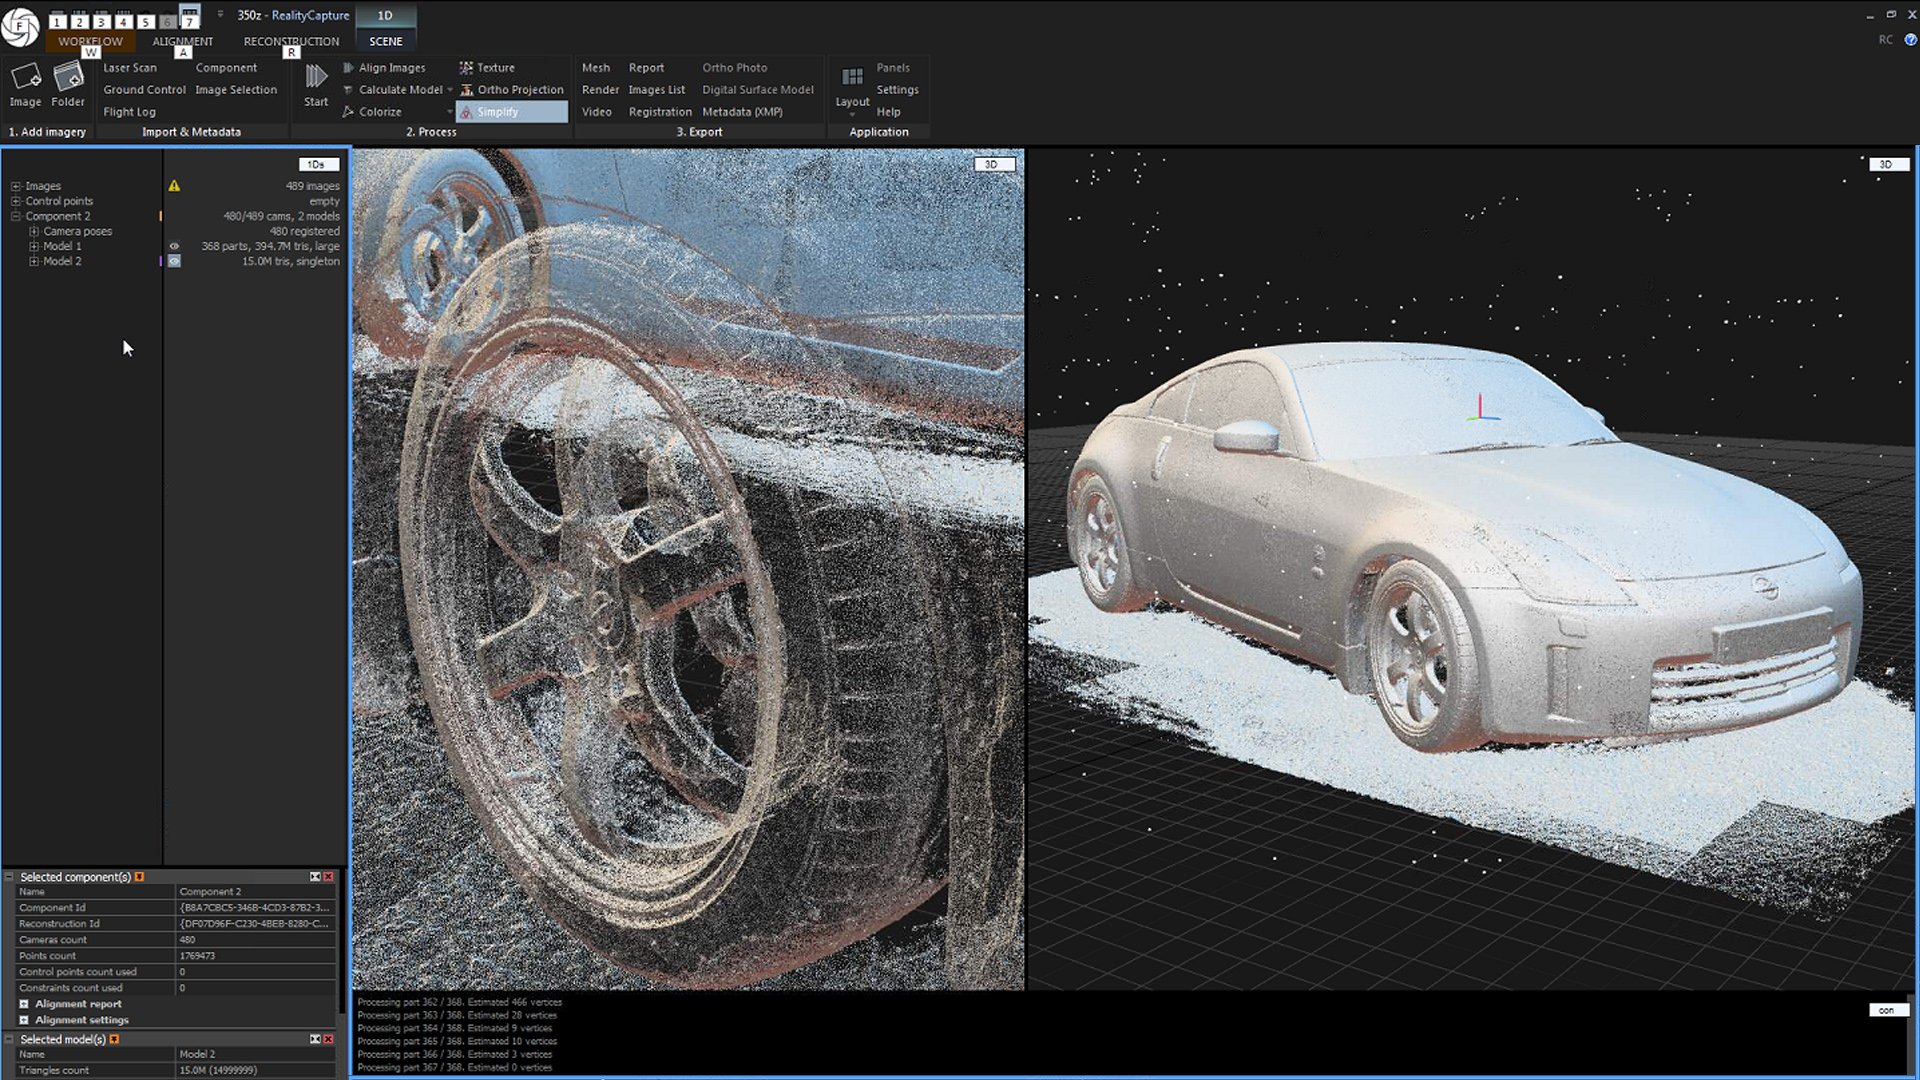
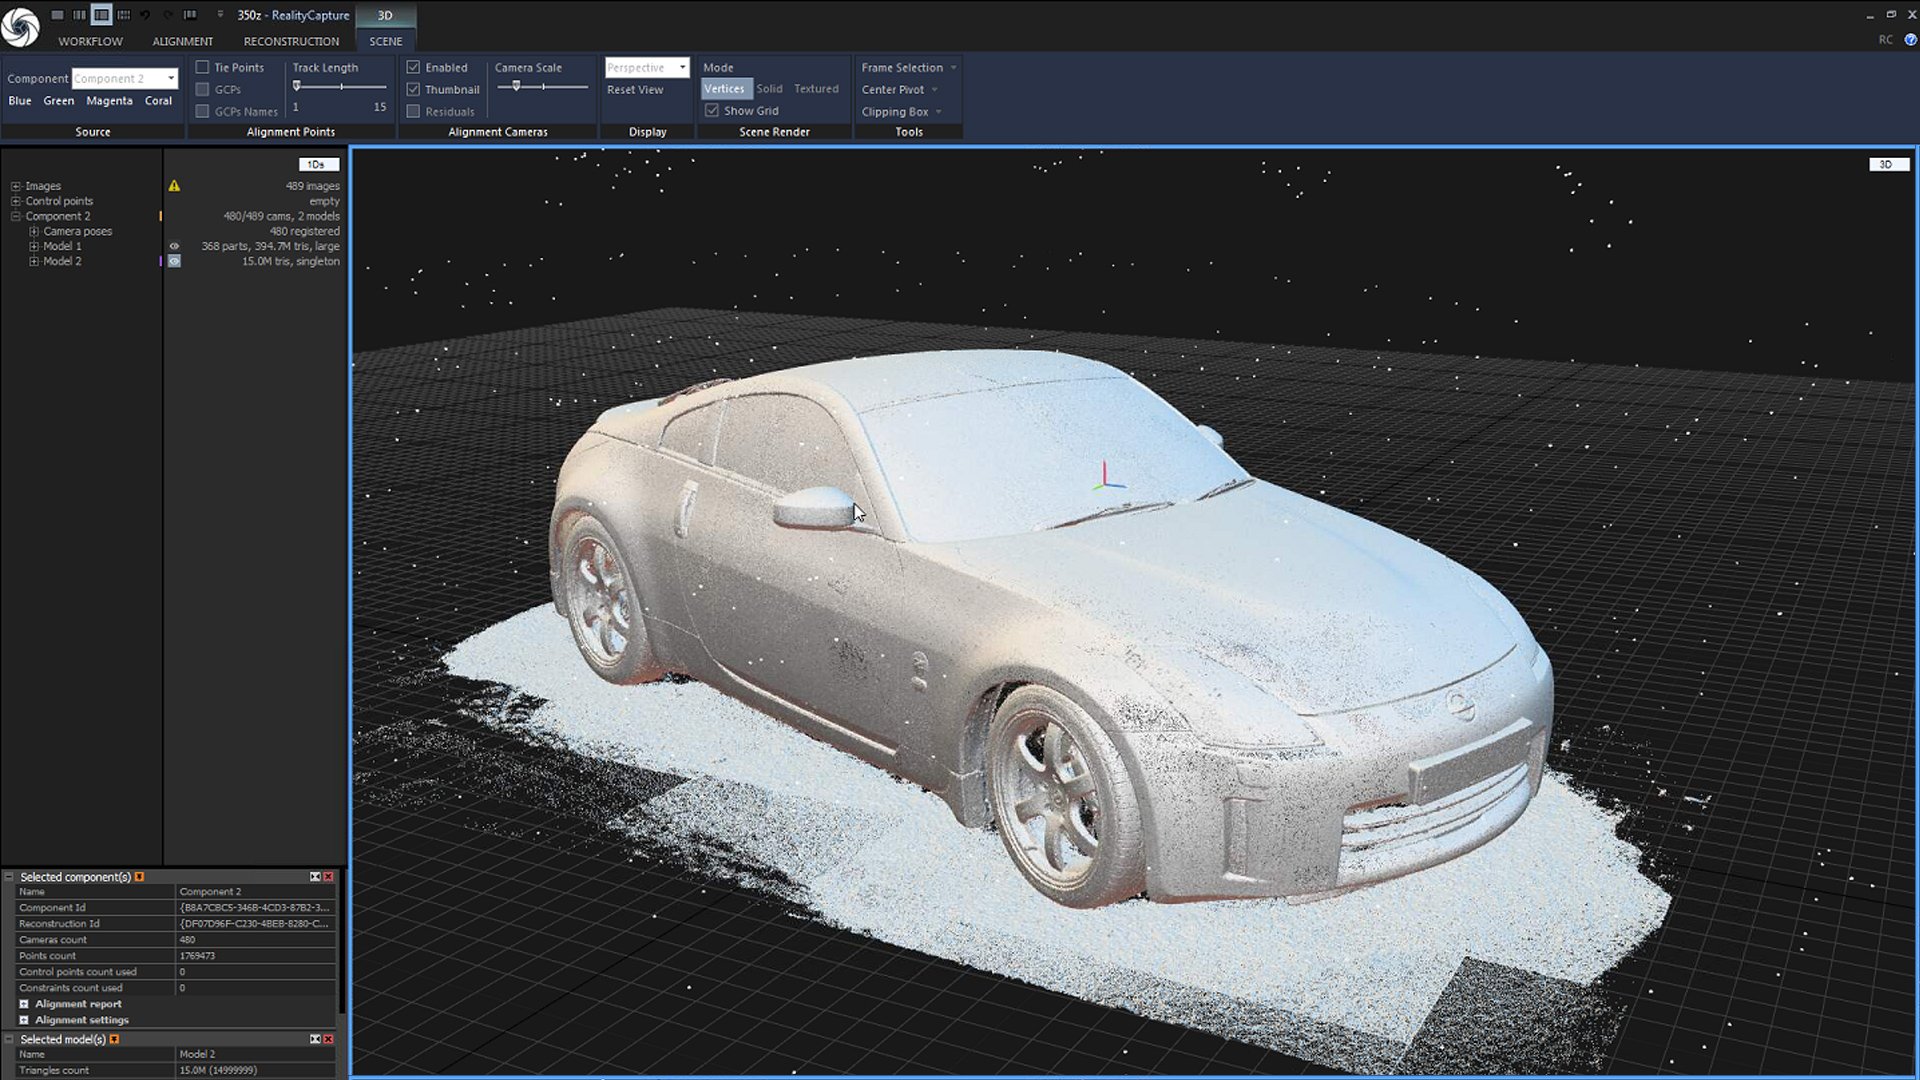
Further Experiments Using Reality Capture
This is a second test we conducted using an improved scanning technique with better lighting and image shooting techniques, this car will most likely be the subject of the tutorial. This particular test still has its problems, as you can see from the images surface noise is an issue and whilst it's fairly minimal we think we can all but eliminate by shooting with a tripod rather than handheld. As you can see we have managed to do a much better job of the headlights and occluded areas under the wheel arches. This scan was processed using Reality Capture.
We would be very interested to hear from you regarding what software you would prefer us to use for the tutorial. AGI photo scan or Reality Capture, please let us know in the comments below.



35 Comment(s)
I would love to see an AGI photo scan tutorial. Thanks!
Thanks for letting us know Zachary! I might do both :)
Dear Frends, tell us how long does it wiil take to the tutorials release please)
The links to the free scans is broken, can you reupload the 350Z and the fiat scans?
1
1
1
1
1
1
This awesomw, One thing I would like to buy from you guys is a nice scan of tyres like different sizes, is really hard to achieve a perfect look with all details hehe^^
Thanks Jolberto, yes we have talked about this, it would be quite easy to do, just need a good selection of new tyres. Im sure our local garage would let us do it.
1
1
1
1
1
1
So this is only a model for download and there will be a tutorial later?
Yep that's right, the tutorial will be coming in the new year.
Seems to be the tutor will not gonna be released.
1
1
1
1
1
1
I like cars. I hate SDS modelling.
Tell us the secret :O
You will have to wait for the tutorial Maxim :)
1
1
1
1
1
1
Great looking results!
I would prefer to see Reality Capture over Agisoft, but either is fine.
Thanks Patrick, I think we might do both, it's more work but probably much more useful.
1
1
1
1
1
1
I would REALLY like a tutorial with Photoscan since that is the one I use. I have been testing scanning cars but so far it is not good so this will be an interesting read!
thanks a lot...
Leo
Ok no problem Leonardo. It's actually harder with PS as it can't handle as many images as easily as RC can but I will cover it in the tutorial.
1
1
1
1
1
1
I bet the technique has something to do with polarizing filtered shots averaged together. That would get rid of a lot of reflections. Gotta think about this one. Interesting problem, for sure.
You won't get it out of us until the tutorial is released I'm afraid Andy :)
1
1
1
1
1
1
Agisoft please!!
No problem :)
1
1
1
1
1
1
I prefer Reality Capture, but there are more Agisoft users so my vote is for Photoscan. Both would be ideal though :)
I think based on the response we will do both :)
1
1
1
1
1
1
Photoscan
Will you post a link to the tutorial, or how we know when it's ready?
Yes we will post a link on our Facebook pages and newsletter.
1
1
1
1
1
1
Mac based for the moment, and running all other PC software under bootcsmp&windows10. Sadly, Mac does not have compatible CPU for reality capture,therefore, I prefer the tut for Agi even though it will take several hundred years:)
Ha ha yea it might take some time and also might need splitting up into chunks for people without huge amounts of RAM. :)
1
1
1
1
1
1
I would like to see the process in Photoscan.
I'm very curious to see your workflow!
Is that picture of the 370z (http://www.3dscanstore.com/image/data/01CarScan/car.jpg),
from the shots you used for the 3d scan?
Or is it just a random photo?
1
1
1
1
1
1
I would love both of them!
1
1
1
1
1
1
I am sorry maybe I missed a post explaining it but when do you think you will be able to have the tutorials up?
thanks a lot...
Leo
1
1
1
1
1
1
I'd love to see the Photoscan workflow. Are there any news regarding this tutorial?
1
1
1
1
1
1
Would love to see a tutorial on this subject
1
1
1
1
1
1
Hi, I'm looking forward to see tutorial :D Can you indicate us when it's gonna be released?
1
1
1
1
1
1
I'm working on it too:
Honda Civic 3d Scan
https://vimeo.com/216083710
https://www.flickr.com/photos/150354121@N02/
These captures look amazing! Great work! I'm going to do some trial and error runs to see what kind of results I can get. Do you have any recommended settings? The tutorial looks to have been side stepped.....I'm really interested in learning more info about this!
1
1
1
1
1
1
Hey there,
how are you guys doing?
We are waiting all so thrilled for the tutorial ;)
Actually I would like to ask you for a collaboration / business inquiry. BUT the question is, would you like to develop a system where we can scan hundrets of cars a day? We do. With you.
Give us a shout.
1
1
1
1
1
1
Hey guys,
thank you for your great work. I think there are a lot of people very interested in the workflow and a tutorial. So please do us the favour, we really would appreciate it.
Thanks
1
1
1
1
1
1
Hello good afternoon.
Thanks for sharing the great stuff.
I would also like to see the tutorial using the two software options.
Regards
Nilton Cavenaghi
Brasil
1
1
1
1
1
1
I guess this subject went dark and they decided not to divulge the information? I havent seen anything about it anywhere??
1
1
1
1
1
1
Yeah, looks like they decided to keep it for themselves... unfortunately :(
1
1
1
1
1
1
Great introduction on how you are scanning cars. Was the tutorial of how you did this available somewhere? You mention doing a post about that in this and was wondering were I could find that post.
Thank you,
1
1
1
1
1
1
A bit of a bait-and-switch, seems like. It's 2018 and no info in sight. I guess you guys decided it would be bad for business.
1
1
1
1
1
1
hi.please release tutorial!we dead!
1
1
1
1
1
1
1
1
1
1
1
1
1
1
1
1
1
1
1
1
1
1
1
1
1
1
1
Hello There,
Has the 3D Scan been removed or is it just my browser that won't allow the download?
If possible would you please be able to make the 3D scan available again?
Thanks very much!
It's really cool work.
I came here because I was interested in car scanning.
Are there any tutorials released?
the link to the free scans is broken, can you reupload them please?
Leave a Comment